Key information about cyberbattle reports for attackers
A report that is filled out properly saves time for both the jury and the teams.
This guide will help you navigate the red team's account on the platform and show you how to fill out reports to score points.
This guide will help you navigate the red team's account on the platform and show you how to fill out reports to score points.
What you will find in this document


Navigating the red team's account
This section will tell you about the most important sections of the red team's account on the platform.
If you're a visual learner, you can check out our video, where we demonstrate various features of the red team's account. However, the video doesn't cover some of the important details of step descriptions, so make sure to read how to fill out a report and checklist before submitting your report.
If you're a visual learner, you can check out our video, where we demonstrate various features of the red team's account. However, the video doesn't cover some of the important details of step descriptions, so make sure to read how to fill out a report and checklist before submitting your report.
Main page
First off, log in to the platform
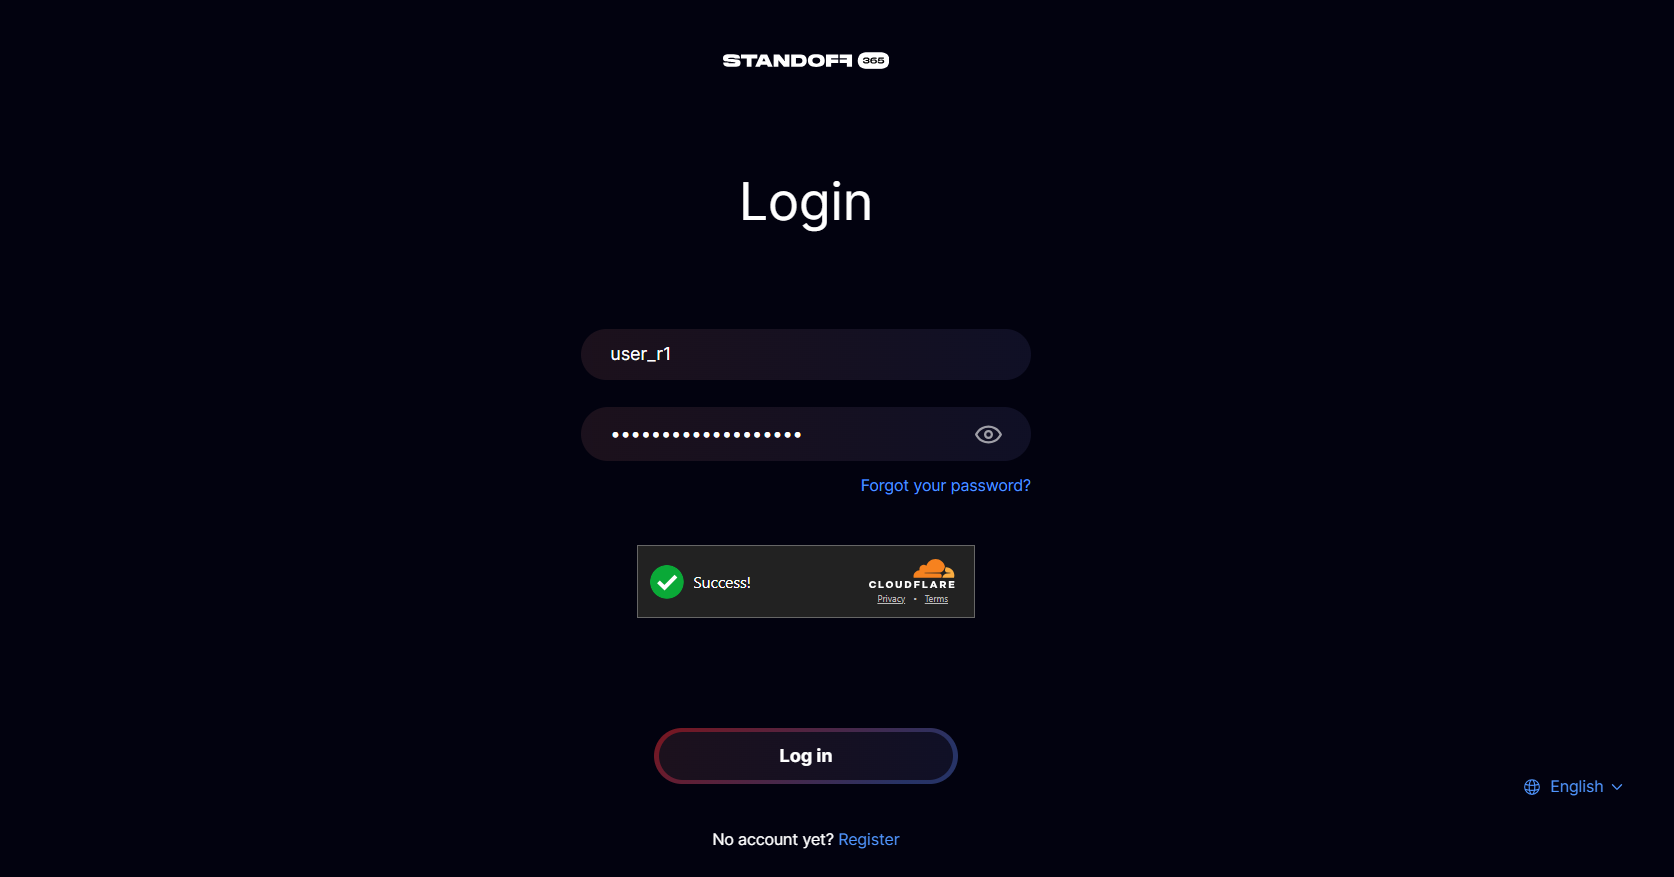
Logging in to the platform
To go to the cyberbattle:
If the cyberbattle you're looking for isn't there, it means your application hasn't been approved yet.
- Click on your avatar.
- In the drop-down menu, select the cyberbattle.
If the cyberbattle you're looking for isn't there, it means your application hasn't been approved yet.
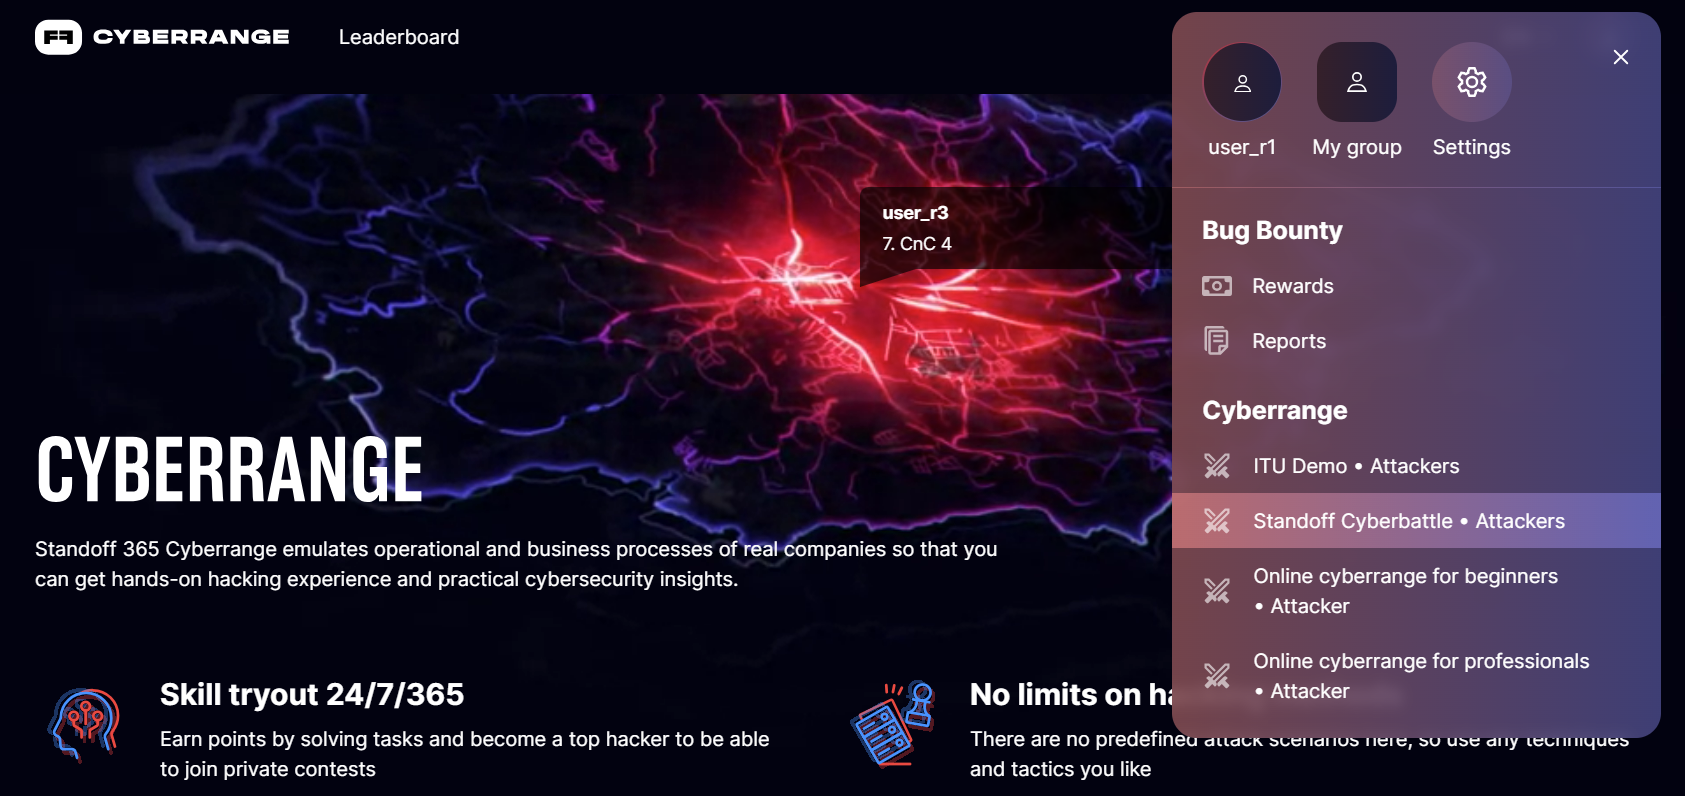
Navigating to the cyberbattle
Next up, you'll see your team's account, where all the participants are listed, including the captain and the team members.

Team's account
The team captain can add and remove team members before the cyberbattle begins.
To add members
Click Add members and type in the username of the person you want to invite to join your team.
To remove members
Click the icon to confirm.
Team requirements may vary depending on the cyberbattle. Make sure to check them out before you remove or add a team member.
There are several important sections in your account that you and your team will find useful during the cyberbattle.
Industries section
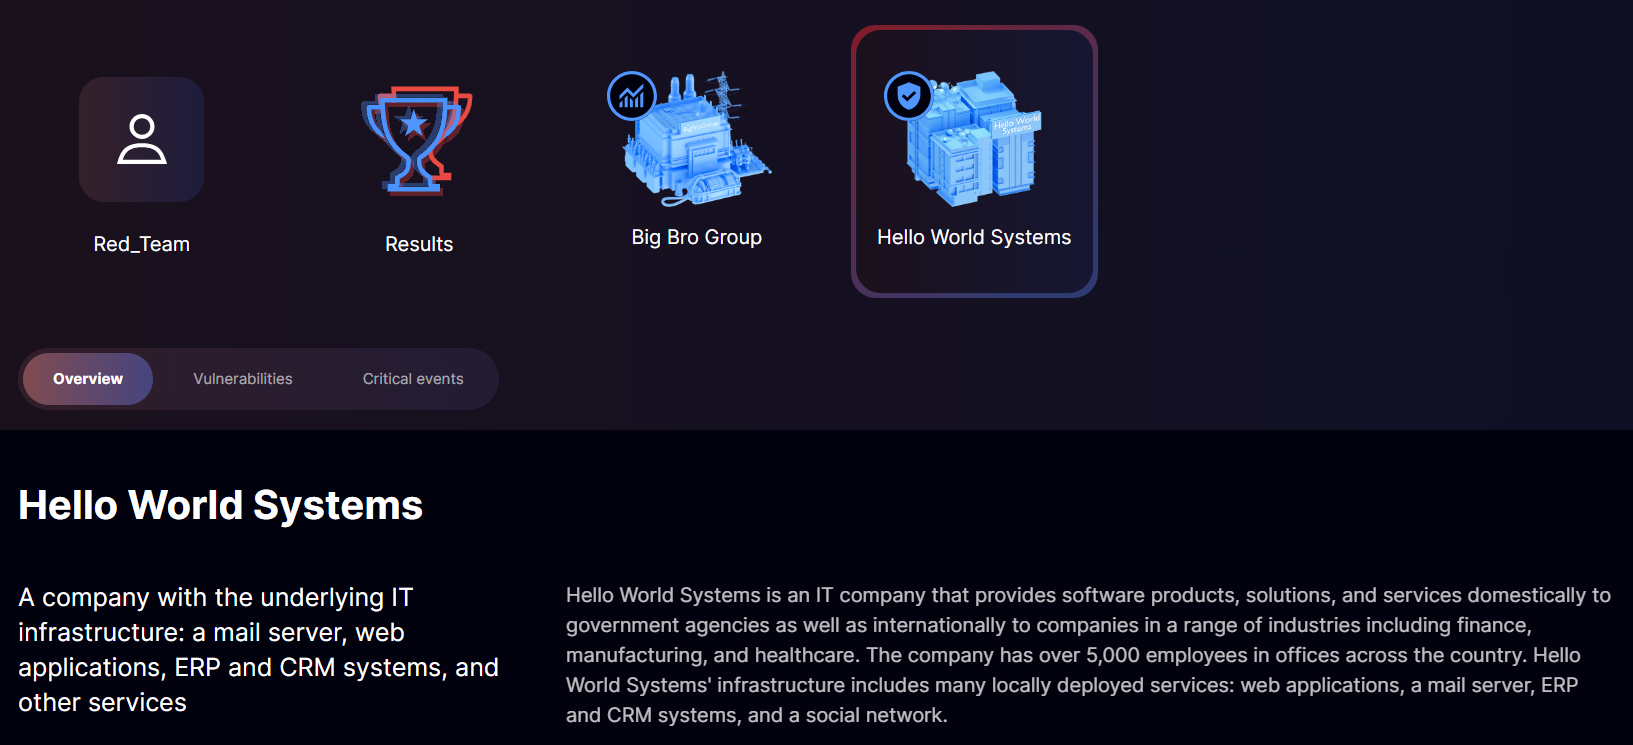
Industries section
Click on any of the industries to see its description. Switch between tabs to see the list of vulnerabilities and critical events as well as the maximum points you can score for completing the task.
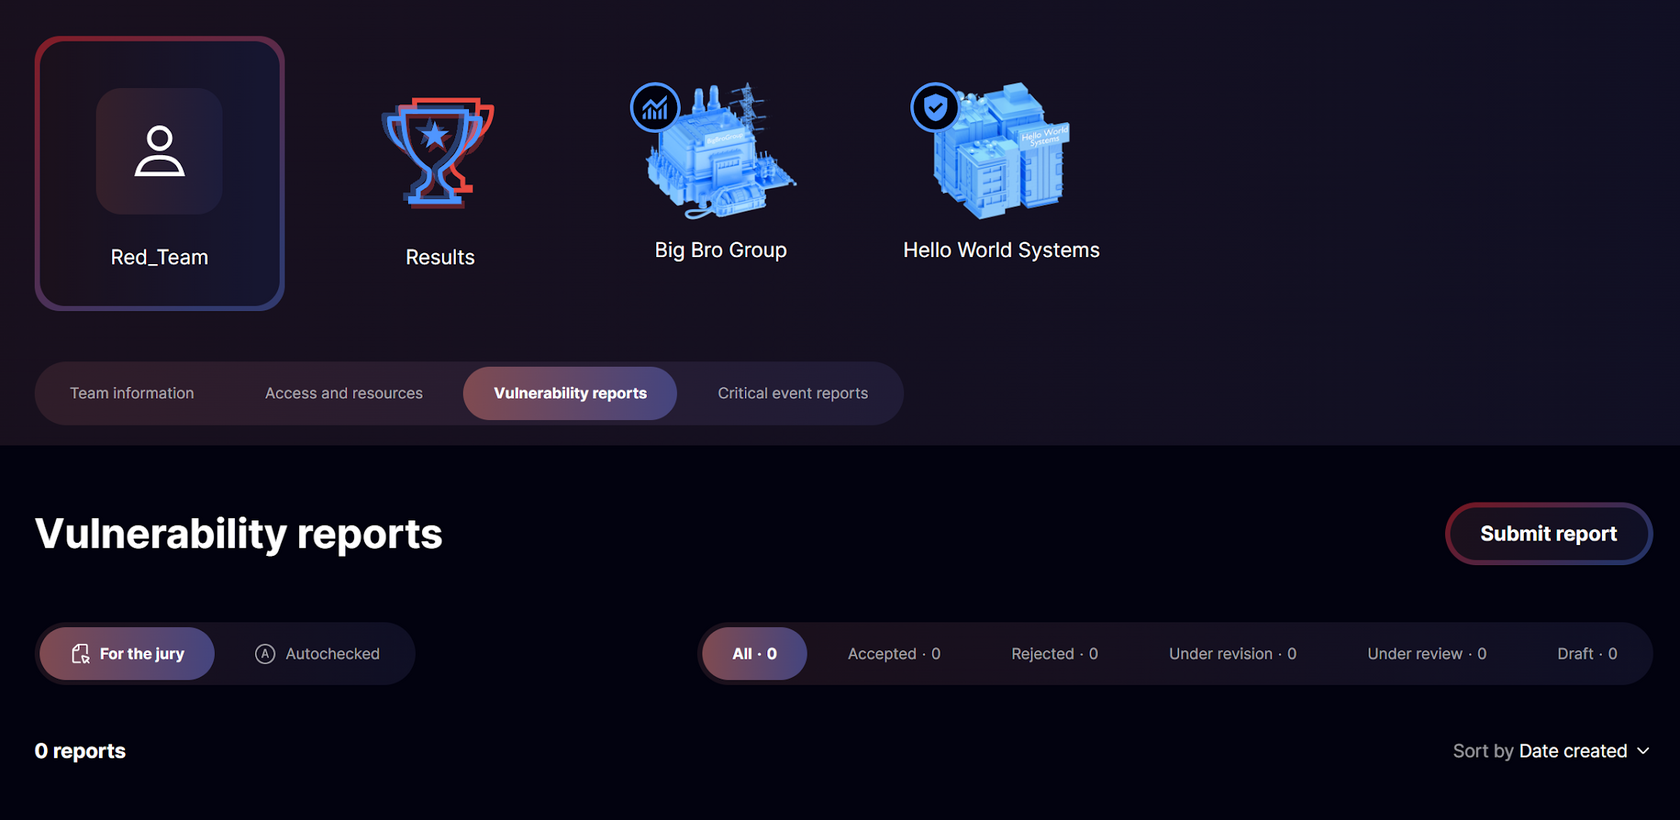
Team reports section
On the team page, you'll find vulnerability and critical event reports.
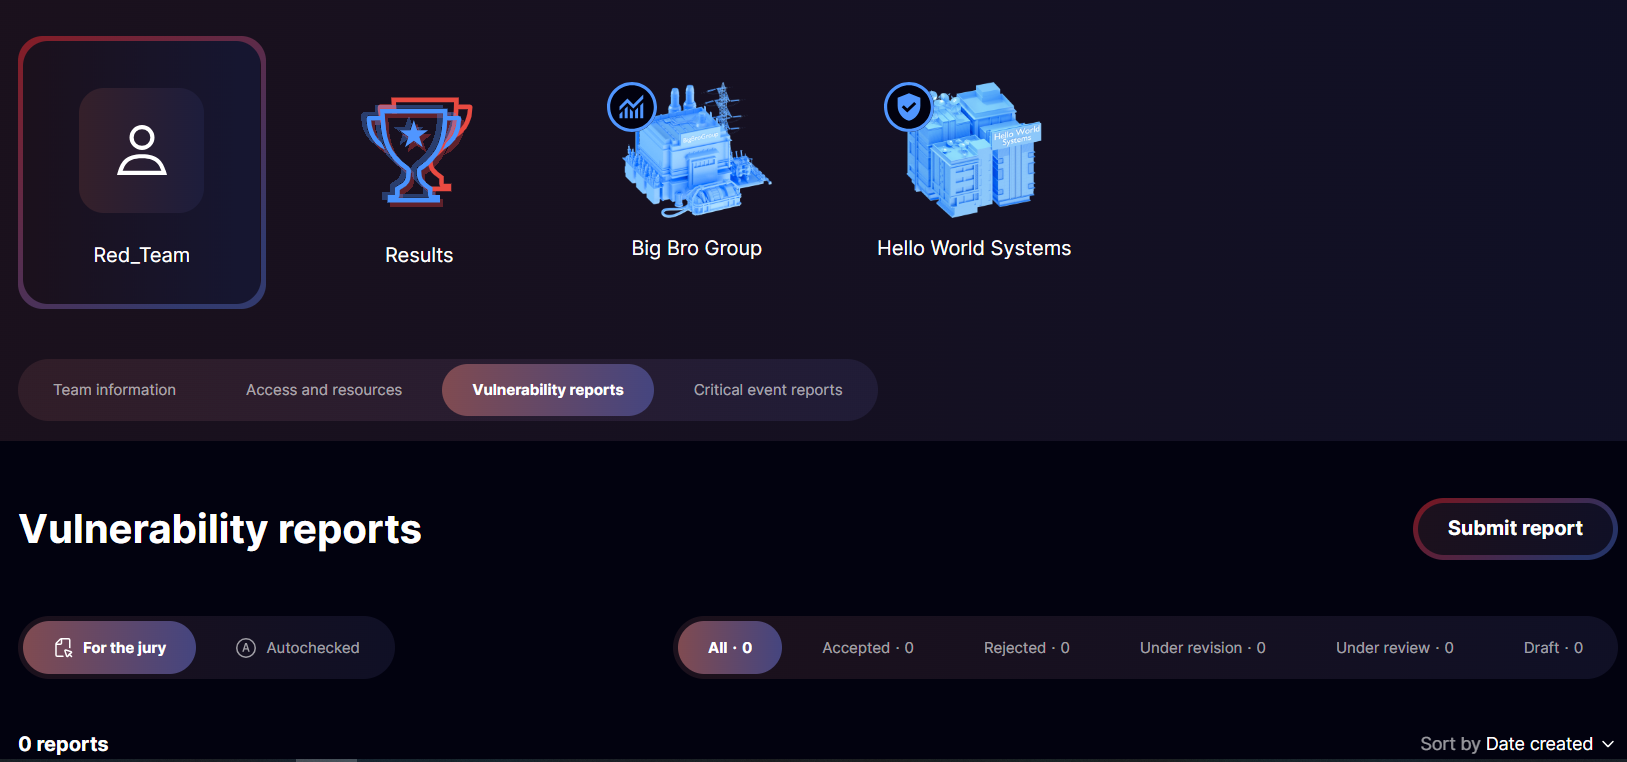
Team reports
You can submit reports right after the cyberbattle begins.
There are two types of vulnerability reports: autochecked and jury-reviewed. The report type will be selected automatically depending on the vulnerability.
Report for the jury
To submit a report, click Submit report on the Vulnerability reports tab.
Report for the jury
To submit a report, click Submit report on the Vulnerability reports tab.
Vulnerability reports
Button to submit a report
In the form that opens, specify the following:
- Attack target.
- Vulnerability type.
- Vulnerability description. Make sure to include the steps that led you to discover the vulnerability.
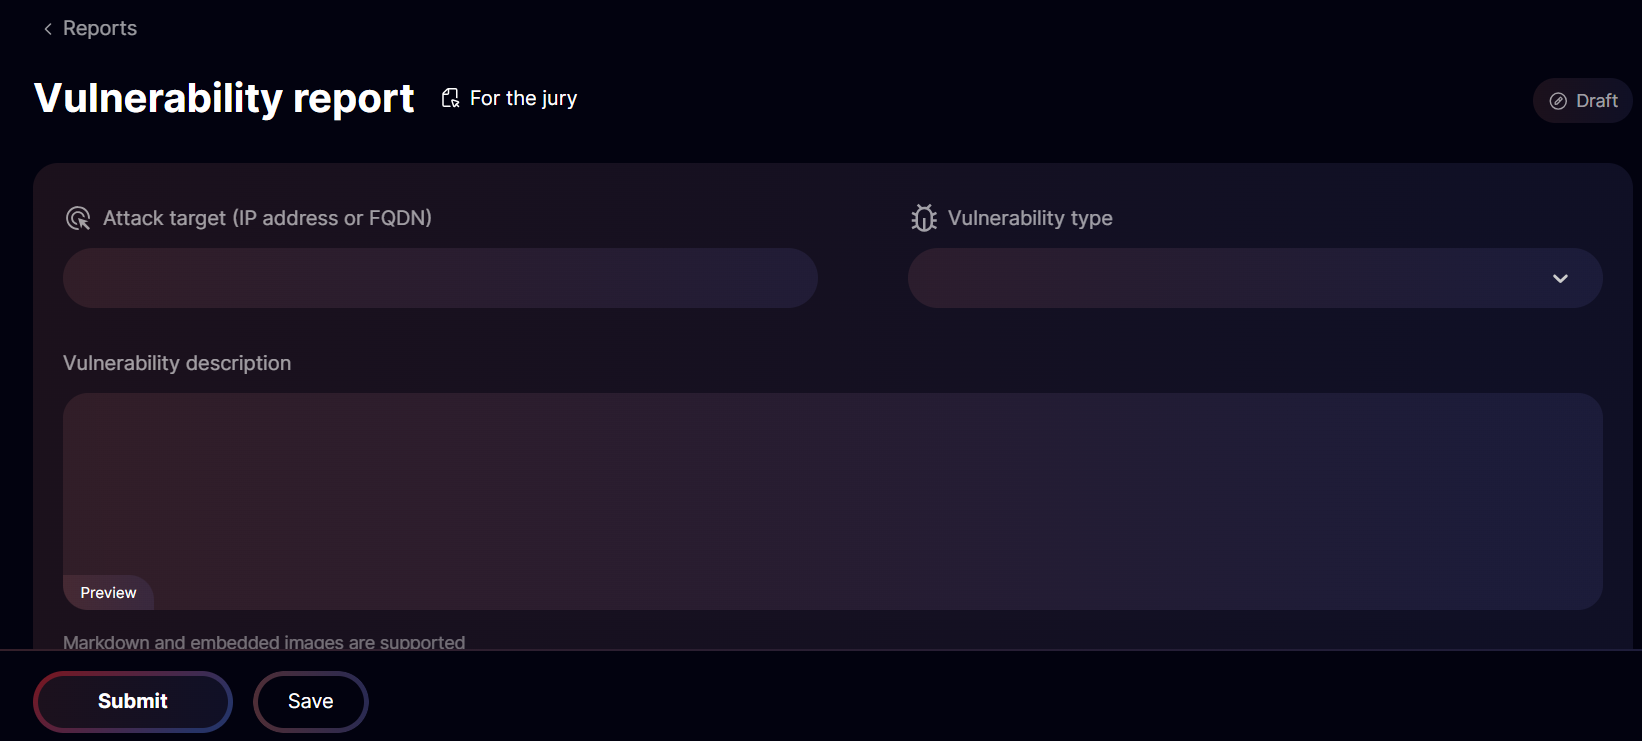
Filling out a vulnerability report
If any of the required fields are left empty, the system will highlight them before you submit your report.
Attach screenshots of your actions so the jury can review your report faster.
Attach screenshots of your actions so the jury can review your report faster.
There are also two types of critical event reports. The type is set automatically depending on the selected event. The report type can't be changed.
Report for the jury
To submit a report for the jury:
Report for the jury
To submit a report for the jury:
- On the Critical event reports tab, click Submit report.
- From the drop-down list Critical event, select the critical event that's been triggered.
Critical event reports

Selecting a critical event
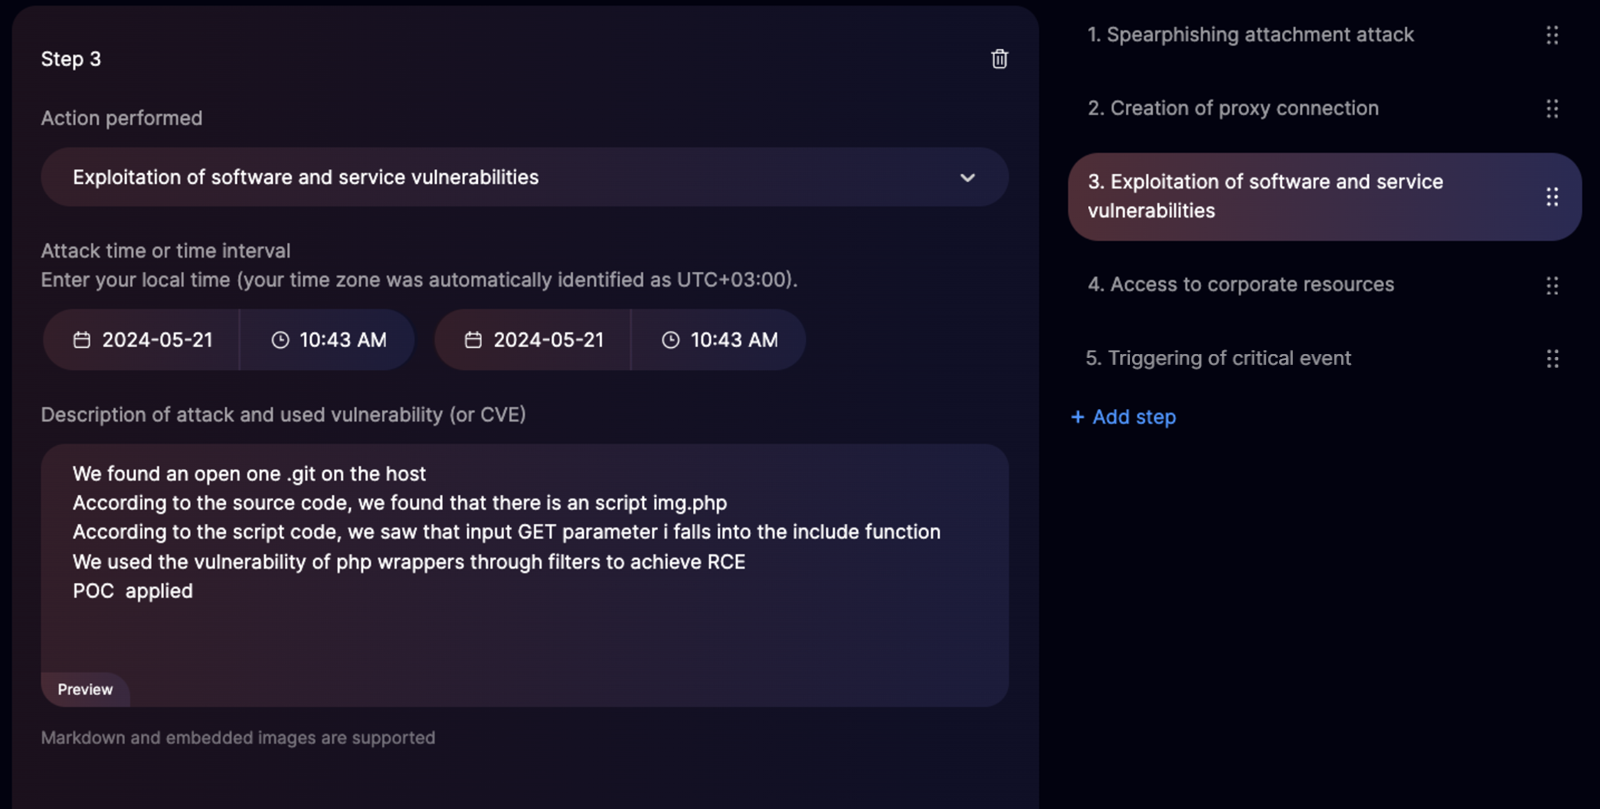
3. In the form that opens, describe the attack step by step. You can add, delete, and rearrange the steps.
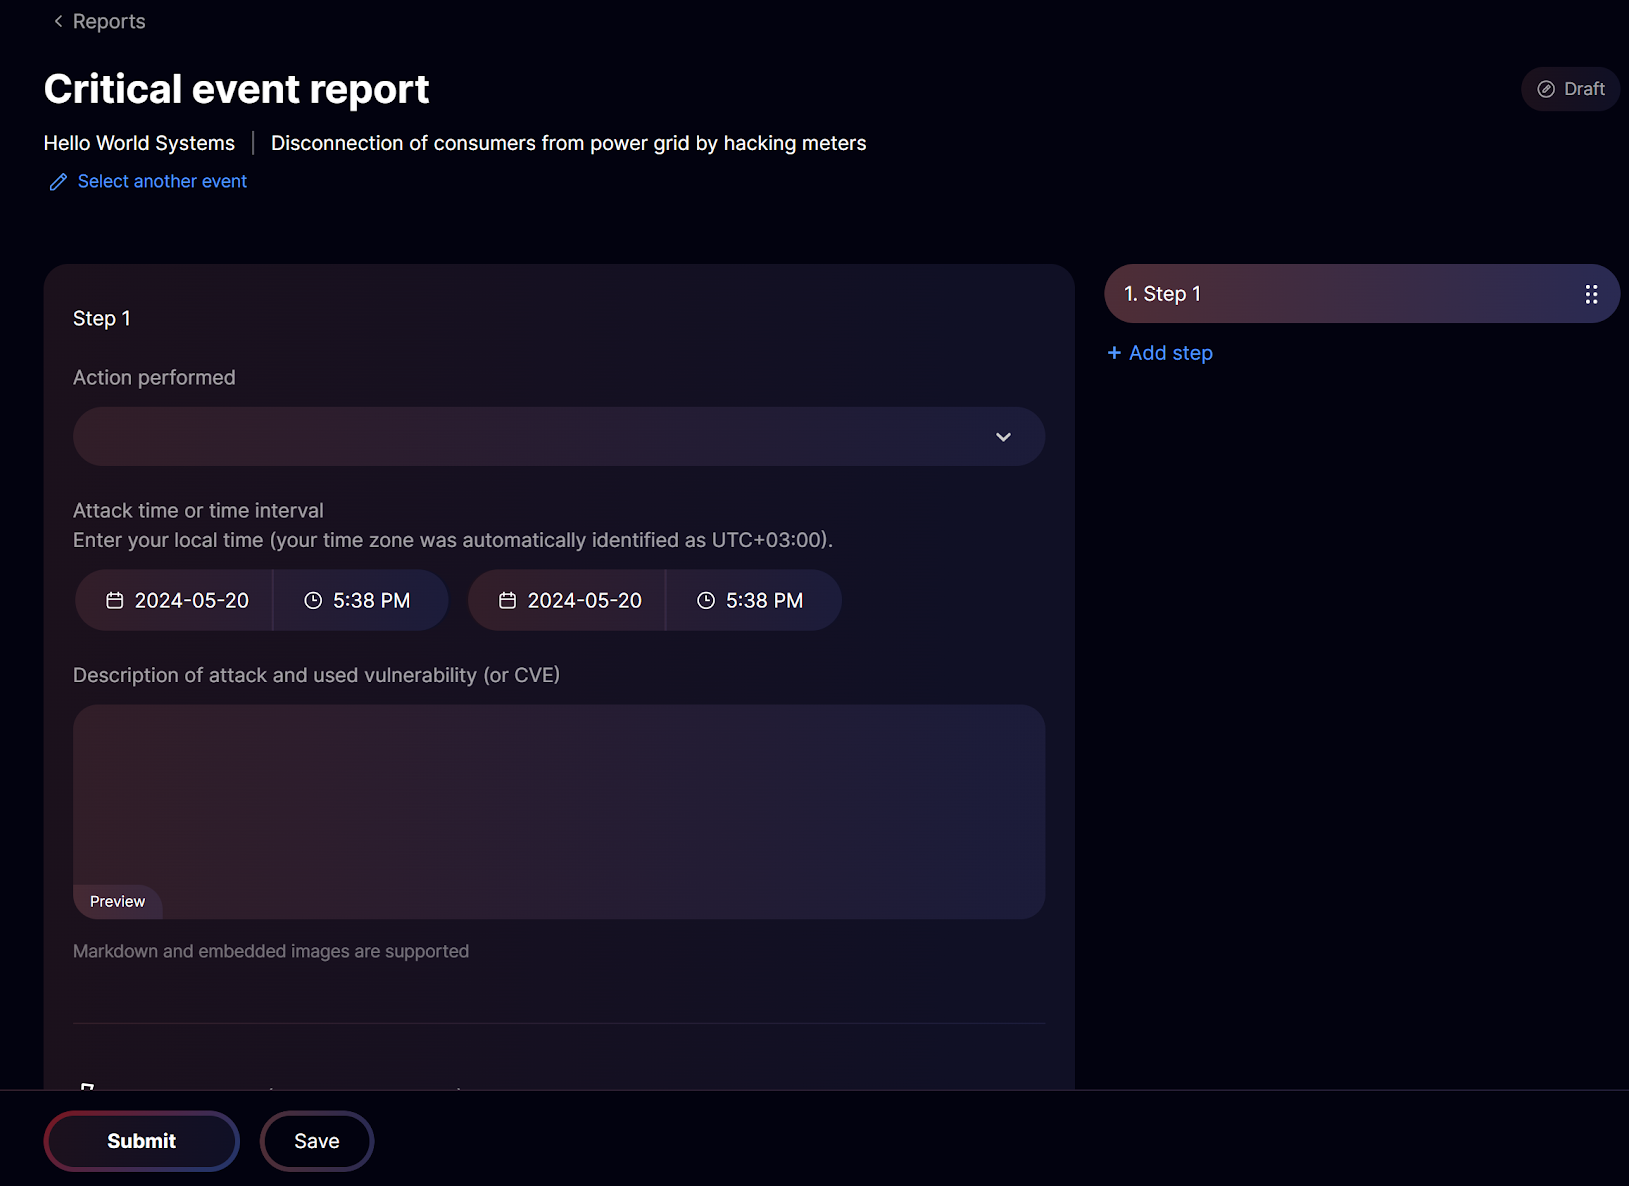
Adding steps
In the Action performed list, select an action for each step and describe it in detail.
Specifically, make sure to include the following:
Attach screenshots of your actions so the jury can review your report faster.
Important: the attack time is set automatically, so don't forget to change it manually before you submit your report. Use your local time zone.
For more details on filling out your report and increasing your chances of getting it accepted, see the How to fill out a critical event report section.
Autochecked report
To submit an autochecked report:
Depending on the parameters of the cyberbattle, some critical events can help you earn extra points, for instance, by revealing attack vector details or providing information about accounts and nodes. The values will be checked together with the flag, so you have only one attempt. For every correct parameter, you'll score some extra points.
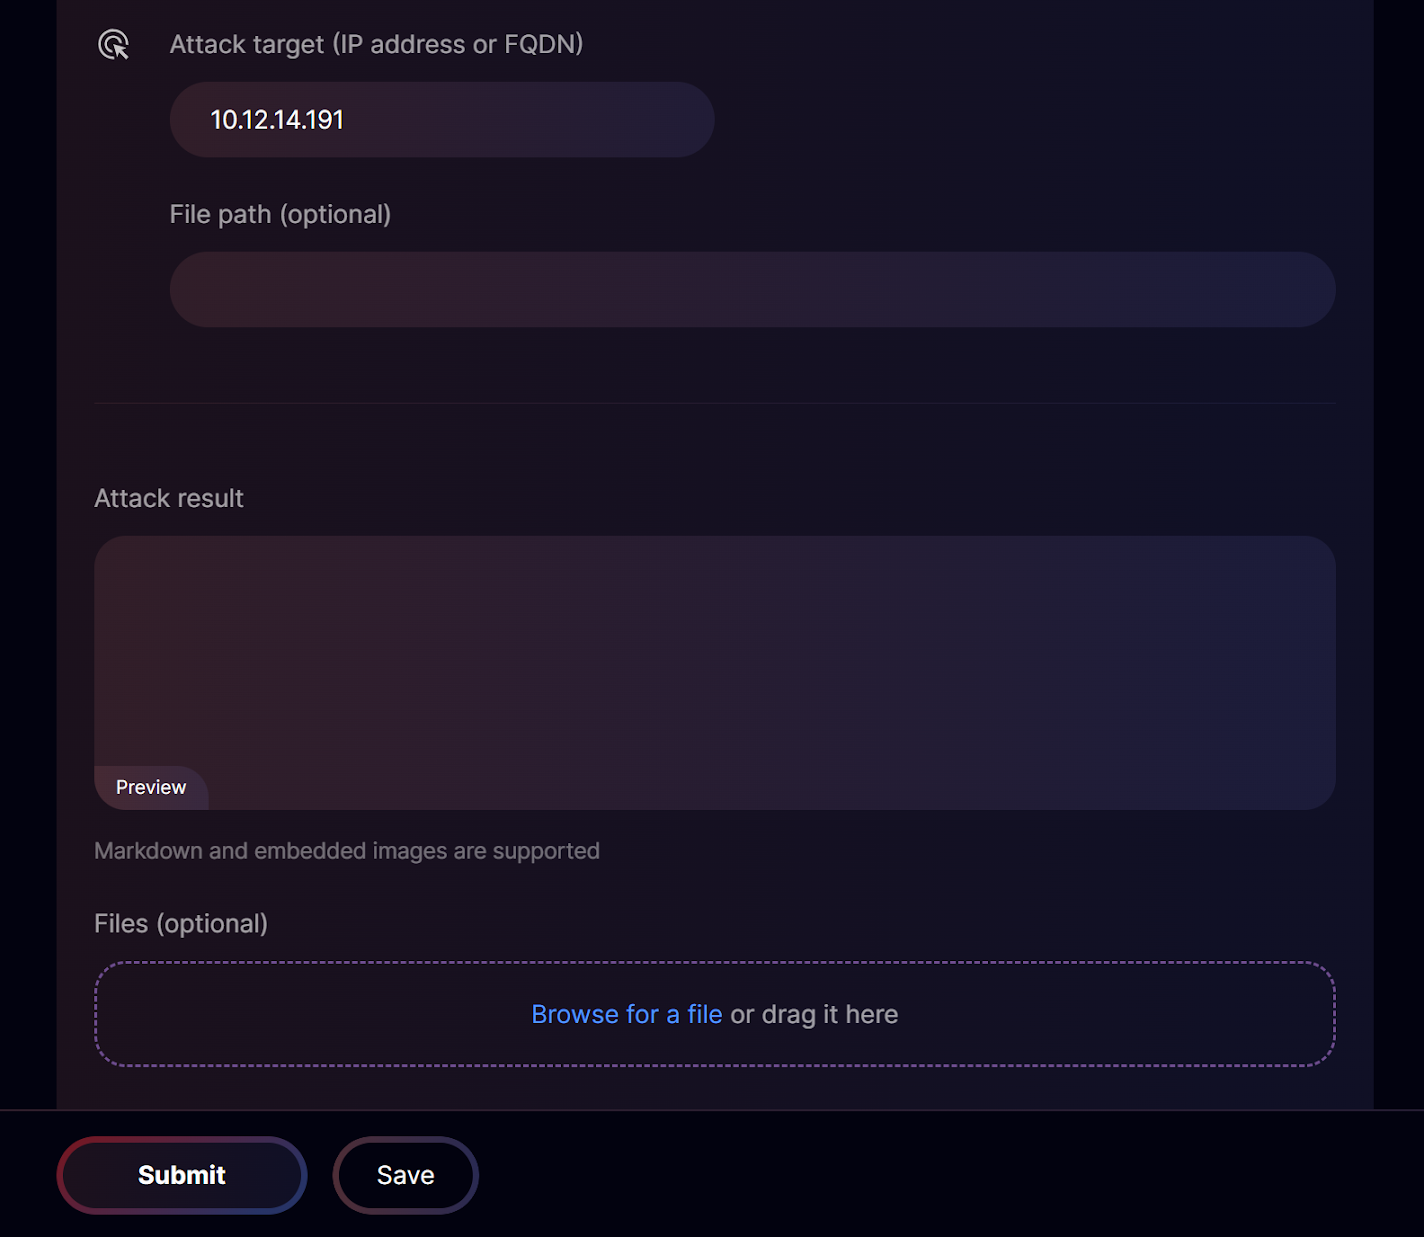
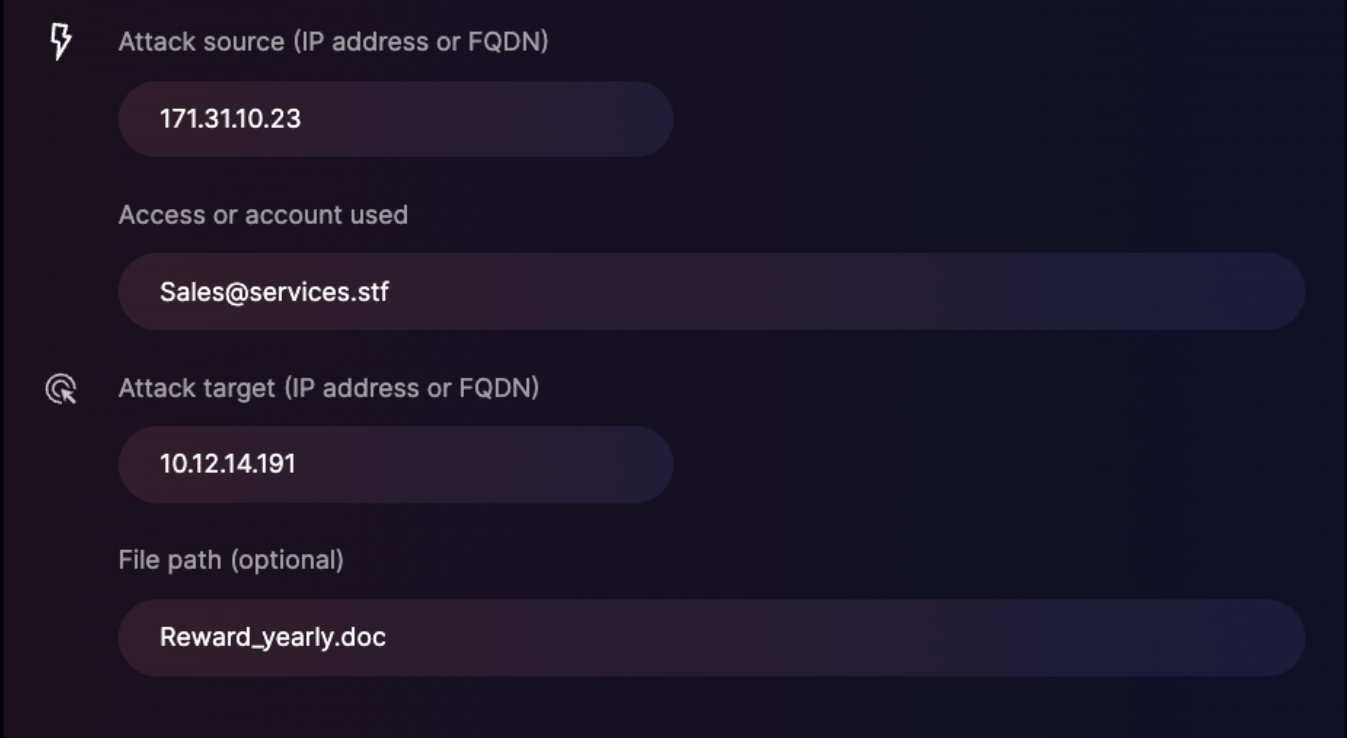
Specifically, make sure to include the following:
- IP address from which the action was performed.
- Access or account used, if possible.
- Attack target.
- File path, if it's relevant to the attack step you're describing.
- Attack result. Describe all the useful information you gained at this stage.
Attach screenshots of your actions so the jury can review your report faster.
Important: the attack time is set automatically, so don't forget to change it manually before you submit your report. Use your local time zone.
For more details on filling out your report and increasing your chances of getting it accepted, see the How to fill out a critical event report section.
Autochecked report
To submit an autochecked report:
- On the Critical event reports tab, click Submit report.
- From the drop-down list Critical event, select the critical event that's been triggered.
- Enter the flag you've found.
Depending on the parameters of the cyberbattle, some critical events can help you earn extra points, for instance, by revealing attack vector details or providing information about accounts and nodes. The values will be checked together with the flag, so you have only one attempt. For every correct parameter, you'll score some extra points.

Fields for additional parameters
Draft reports for the jury
All reports for the jury are autosaved to drafts every 15 seconds. This does not apply for autochecked reports.
The Changes saved notification means that the draft of your report has been saved. To force-save your draft, click Save. Keep in mind that your report is submitted for review only after you click Submit report.
The Changes saved notification means that the draft of your report has been saved. To force-save your draft, click Save. Keep in mind that your report is submitted for review only after you click Submit report.
Button to submit a report
You can easily find a draft in the list of reports by its status. Any team member can open and edit drafts.
What happens after you submit your report
After you submit your report, it's queued for review by the jury. Until the reviewers start working on it, it's labeled as New. As soon as the jury starts the review, the report is moved to the Under review tab. Once a report is under review, you can't edit it, but you can add a comment for the jury
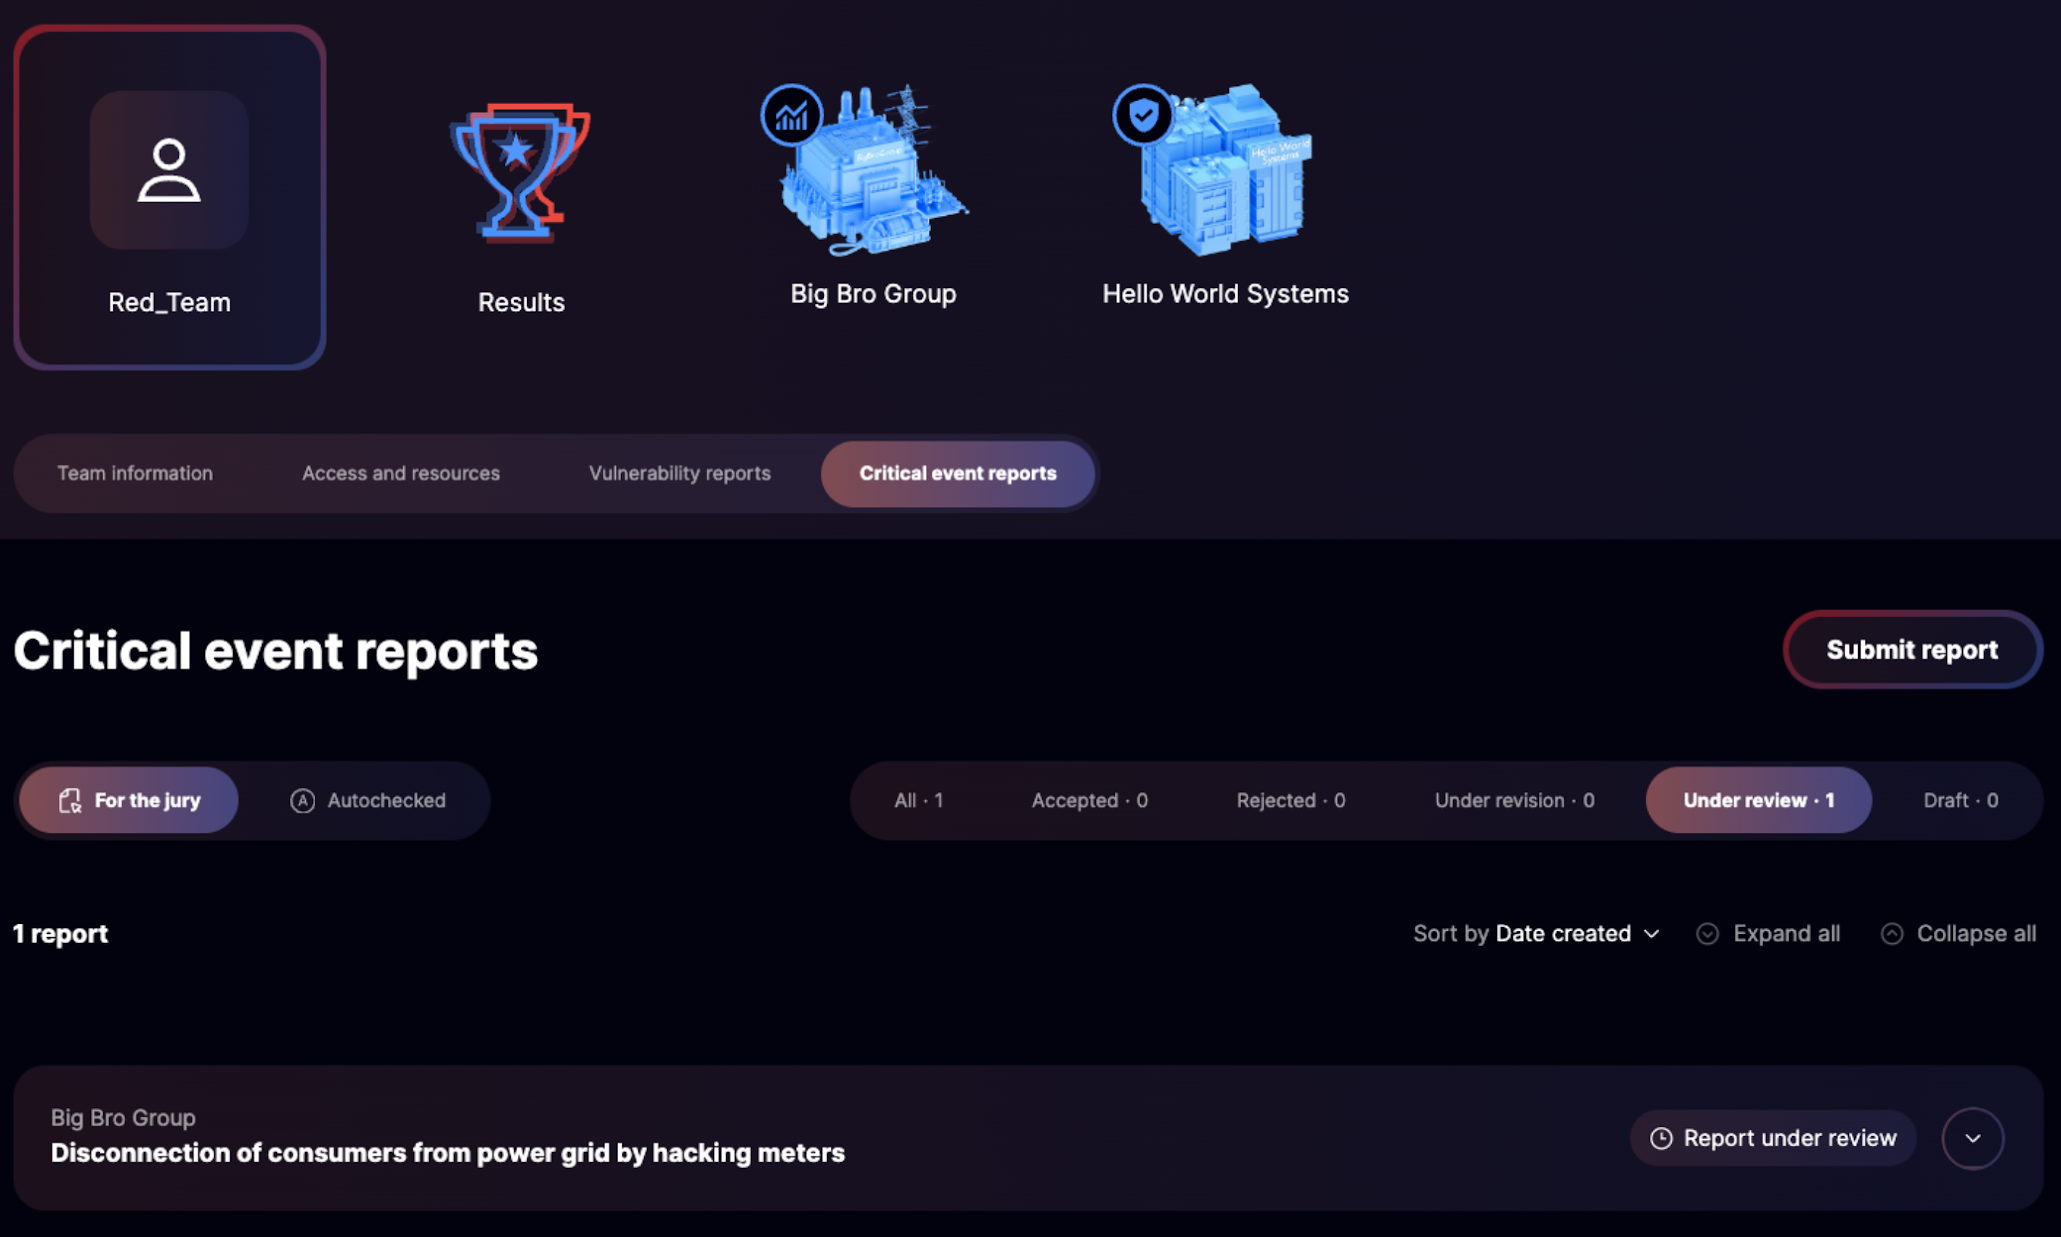
Reports under review
If you realize there's a mistake in the report you've submitted, your next move depends on its status.
Minor adjustments or clarifications required
You can add a comment to the report you've already submitted to clarify your logic to the jury
Serious issues need fixing
You can withdraw your report and fill out a new one. The new report will be sent to the end of the review queue, which is still better than having to fix your report after it's been rejected by the jury.
Depending on the extent of revision, the jury can do either of the following:
- Send the report back for revision. If there are minor inconsistencies or the jury needs some clarifications, the report is moved to the Under revision tab.
- Reject the report. In this case, the report appears in the Rejected tab, and you need to redo it.
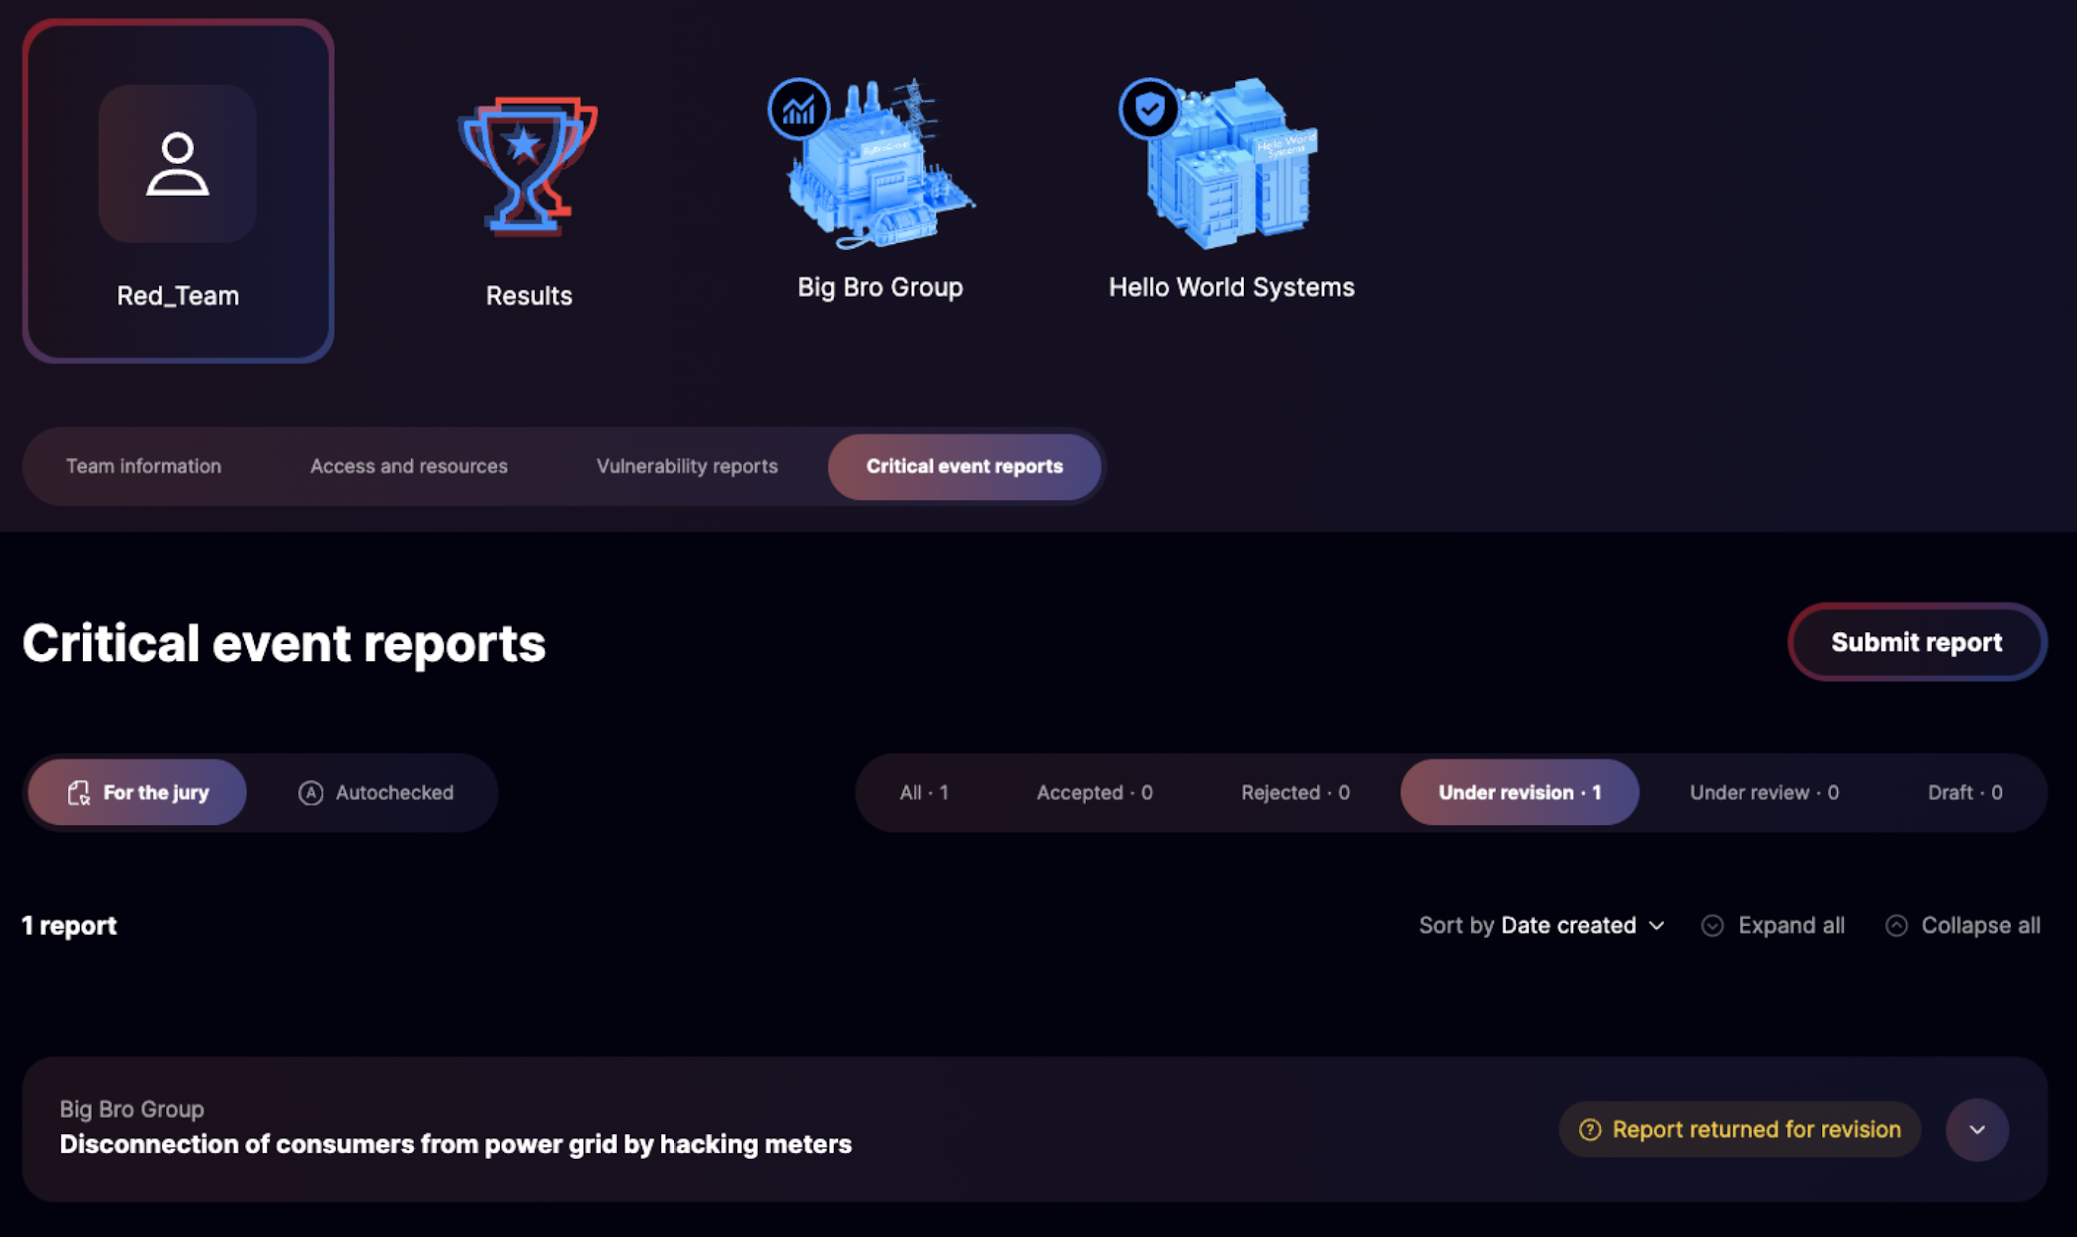
Reports under revision
When revising your report, don't forget to check the jury's comments: there might be some useful information in there. After you submit your changes, the report will be moved to the New tab and then to the Under review tab.
As soon as the jury accepts the report, points will be awarded to the team.
As soon as the jury accepts the report, points will be awarded to the team.
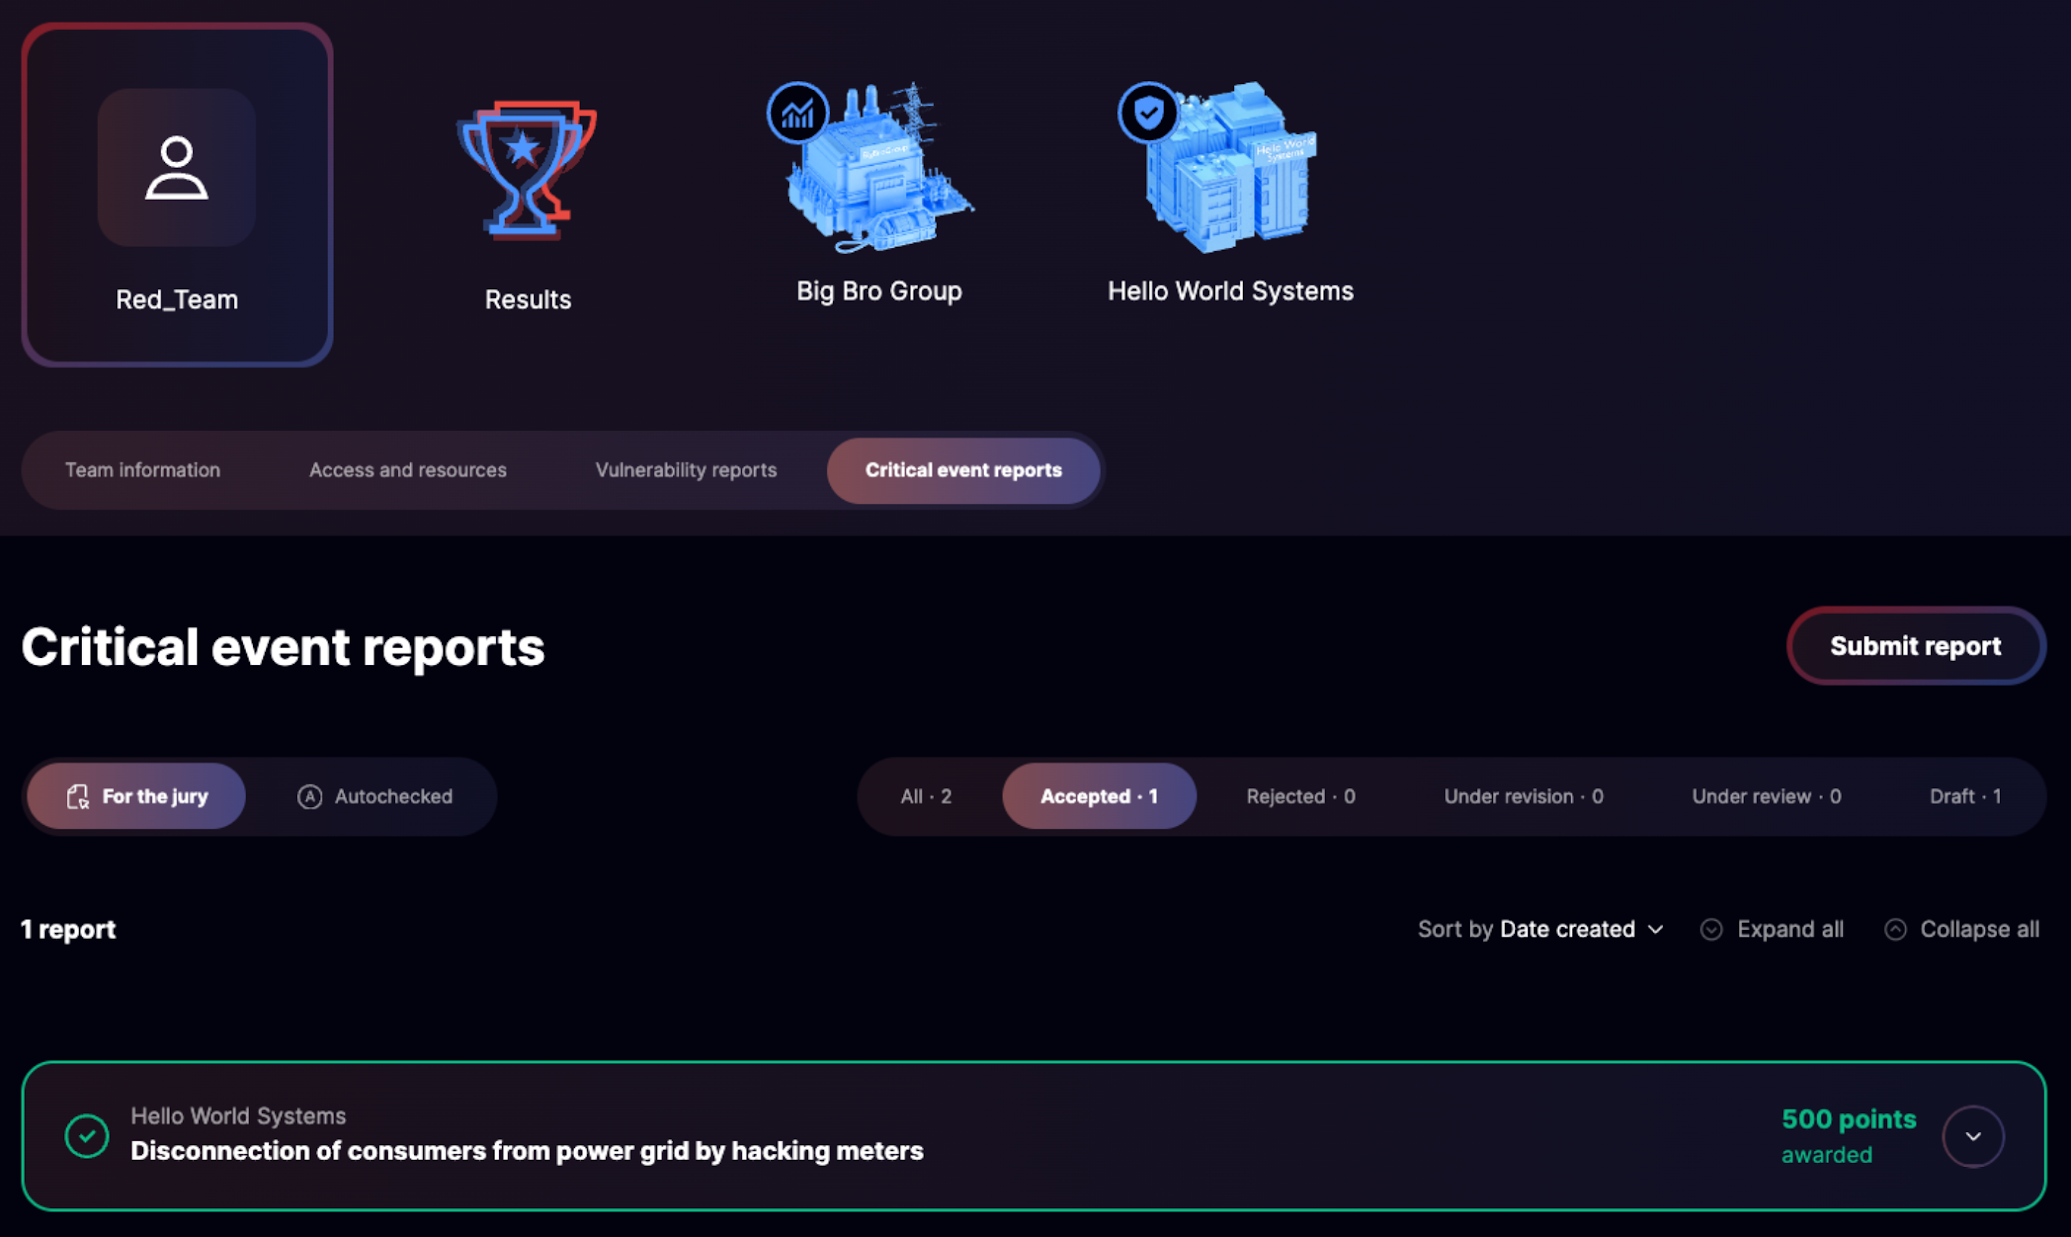
Accepted reports
If another team's report on the same event is accepted before yours, they'll score more points. For more information on how points are awarded, check out the Standoff Cyberbattle rules.
How to save time when filling out a new report
To save time, you can create a new report based on an existing one.
To do this:
Make the necessary edits and submit your new report.
To do this:
- Click Submit new report based on this one.
- In the Critical event list, select the critical event that has been triggered.
Make the necessary edits and submit your new report.
Results section
Your total points are displayed under Results. The team's rating and number of points are updated automatically.
In case you violate the rules of the cyberbattle, the jury can give you a fine or disqualify your team. To avoid this, make sure you study the rules carefully before the cyberbattle begins and follow them throughout the event.
In case you violate the rules of the cyberbattle, the jury can give you a fine or disqualify your team. To avoid this, make sure you study the rules carefully before the cyberbattle begins and follow them throughout the event.
How to fill out a critical event report
Four reasons to fill out your report correctly
- Save time. The jury doesn't have to ask any follow-up questions, which means they'll check your report a lot quicker.
- Acquire a useful skill. Knowing how to accurately describe your actions step by step will come in handy whenever you participate in cyberexercises, bug hunting, or pentesting.
- Contribute to the accurate representation of attack chains (kill chains). During the cyberbattle, we display information about the attacks that have been carried out live, based entirely on the attackers' reports. If the source and target of the attack are incorrectly specified, or a step is not described logically, the kill chain displayed on the screen will be incoherent. Reports that are filled out correctly demonstrate the expertise of the red teams, making the cyberbattle even more engaging for both participants and spectators. Let's make Standoff better together!
- Correlate your actions with TTP by MITRE ATT&CK. In a special section, we keep track of which techniques from the MITRE ATT&CK matrix are used by the attackers and identified by the defenders. It's beneficial for both you and us if the statistics accurately reflect your journey throughout the online cyberrange infrastructure.
Key elements of the report
1. Attack steps
Your entire report will be made up of steps that you describe. For each step, you can choose a description from the table below.
Action group
Action
Data collection
Host data collection
Domain data collection
User data collection
Exploitation of software and service vulnerabilities
—
Attacks on application users
Spearphishing attachment attack
Spearphishing link attack
OS command execution
—
Software upload
Web shell upload
Exploit upload
Hacker tool upload
Access to resources
Access to corporate resources
Access to industrial resources
Setup of network tunnels and proxy connections
Creation of network tunnel
Creation of proxy connection
Data download
—
Obtaining of confidential information
Obtaining of local system information
Obtaining of network storage information
Obtaining of repository information
Obtaining of email information
Account creation
—
Receiving account data
Credential bruteforcing
OS credential dumping
Credential retrieval from files
Credential retrieval from registry
Obtaining of private keys
Kerberos ticket theft or forgery
User credential modification
—
Privilege escalation on resource
—
Maximum privilege escalation on domain
—
Triggering of a critical event
—
Other
—
Use Other only if nothing else on the list fits your actions.
First step
At this stage, you're gathering information, so depending on the path you've chosen, use one of the following options:
If for some reason you don't find these options suitable, use Other. For instance, if you got to the web and started a scanner.
At this stage, you're gathering information, so depending on the path you've chosen, use one of the following options:
- "Data collection": "Host data collection," "Domain data collection," or "User data collection."
- "Attacks on application users": "Spearphishing attachment attack" or "Spearphishing link attack". These options can be used both for reconnaissance (T1598) and initial access (T1566).
If for some reason you don't find these options suitable, use Other. For instance, if you got to the web and started a scanner.
When selecting Other, make sure to name the step according to the MITRE ATT&CK matrix. For example, "Active Scanning."
For the early steps, the source can be out of scope, unless it's your address within the infrastructure. Please double-check your input for typos.
Final step
In the critical event report, the last step is always "Triggering of a critical event."
Final step
In the critical event report, the last step is always "Triggering of a critical event."
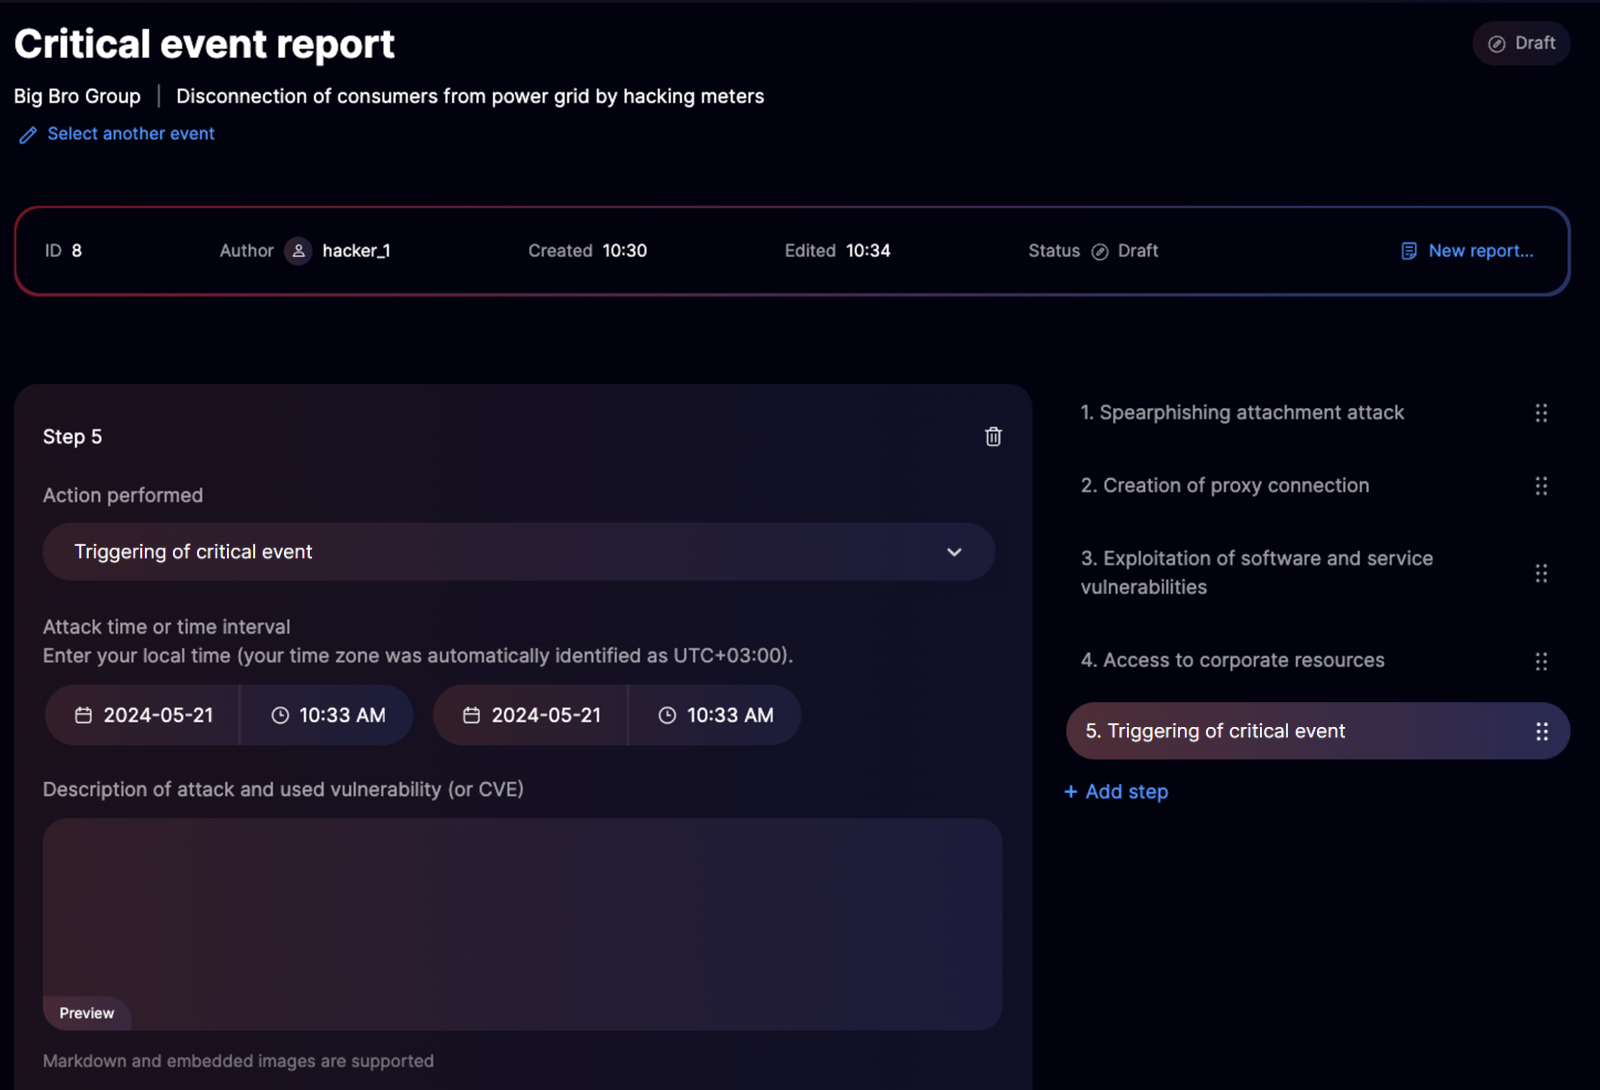
"Triggering of critical event" step
In the Description of attack and used vulnerability (or CVE) box, specify exactly what action was performed, for instance, money withdrawal, access to sensitive data, conveyor shutdown, and so on.
For each step, you need to specify the source and target of the attack—an IP address or an FQDN.
The image below shows an example of how the jury sees a correctly filled out attack target.
For each step, you need to specify the source and target of the attack—an IP address or an FQDN.
The image below shows an example of how the jury sees a correctly filled out attack target.

Correct attack target
If you enter an address that is incorrect, the autocheck won't be able to recognize the host, so your report will be sent back for revision.
Specifics of certain events in reports
When filling out a report, you need to take into account the specifics of triggering certain events.
Specifics of certain events in reports
When filling out a report, you need to take into account the specifics of triggering certain events.
Triggered
What to do
Access to host
In this case, the "Access to resources" step is extended.
If you gained access to anything other than a corporate or technological segment, select Other and name the step "Access to <resource name>."
If you gained access to anything other than a corporate or technological segment, select Other and name the step "Access to <resource name>."
Access to confidential information
Make this action a separate step and select "Access to confidential information"
If the task requires copying, exporting, or in any other way saving data from a file or system, make sure to include an extra step in your report: "Data download"
If the task requires copying, exporting, or in any other way saving data from a file or system, make sure to include an extra step in your report: "Data download"
Lateral movement
Make it a separate step and choose either "Creation of network tunnel" or "Creation of proxy connection." The next step after this must be "Access to resources."
If access was gained using external systems, like a Telegram bot, don't formulate a separate step, just mention it in the Description of attack and used vulnerability (or CVE) box and attach a screenshot
If access was gained using external systems, like a Telegram bot, don't formulate a separate step, just mention it in the Description of attack and used vulnerability (or CVE) box and attach a screenshot
Achieving RCE
In this case, make sure to add the step "Exploitation of software and service vulnerabilities" followed by "OS command execution." If necessary, we recommend adding another step between them called "Software upload," for example, a web shell, an exploit, or other tools
Privilege escalation
Create a separate step and select "Privilege escalation on resource."
Below, we've gathered some examples of how you could name steps depending on specific cases.
Step name
How it should be done
"Achieving RCE on X.X.X.X and setting up a proxy"
This step should be divided into three separate ones:
You can add more details for each step in the Description of attack and used vulnerability (or CVE) box.
- "Exploitation of software and service vulnerabilities."
- "OS command execution."
- "Creation of proxy connection."
You can add more details for each step in the Description of attack and used vulnerability (or CVE) box.
"Registering an account in the PayControl app"
Select "Account creation" and add details in the Description of attack and used vulnerability (or CVE) box.
"Exploiting a flaw in the API logic"
Select "Exploitation of software and service vulnerabilities" and add details in the Description of attack and used vulnerability (or CVE) box.
"Service upgrade"
Select "Triggering of non-tolerable event" and in the Description of attack and used vulnerability (or CVE) box, specify that you've upgraded an airplane passenger's seat
2. Time of attack
The time of attack is the time it took to implement a specific step. You can specify an exact value or a range.

Time of attack
The time should be specified in the exact order of the steps and at short intervals (not as long as, say, 5 hours apart); otherwise, the SOC won't be able to find this step in the security tools.
Always use your local time zone. For instance, the team triggered an event at 12:10 (UTC+2). The jury's time zone is UTC+3, so for the jury, the attack time is 13:10. Don't try to convert the time yourself, or it won't check out, and your report will be returned for revision.
Always use your local time zone. For instance, the team triggered an event at 12:10 (UTC+2). The jury's time zone is UTC+3, so for the jury, the attack time is 13:10. Don't try to convert the time yourself, or it won't check out, and your report will be returned for revision.
3. Attack description and results
You can write descriptions in free form.
Attack description
Make sure that your description is extensive and coherent, you present a reproducible sequence of steps, and nothing is missing.
4. Attack source and target
At the first step, the source of the attack is the VPN server's address (each red team gets a file required to set up the connection), and the target is the host the attackers are connecting to. After that, this host becomes the source, and the next host in the system is the target.
Attack source and target
Only the host that you've gained access to in the previous steps can serve as the source. Make sure there are no typos in the addresses.
5. Access or account used
Specify the account, permissions (for example, System), or username you used to connect to the host. It's crucial that you've obtained them from the previous steps.
6. Files
If you've uploaded files to nodes, attach them to your report.
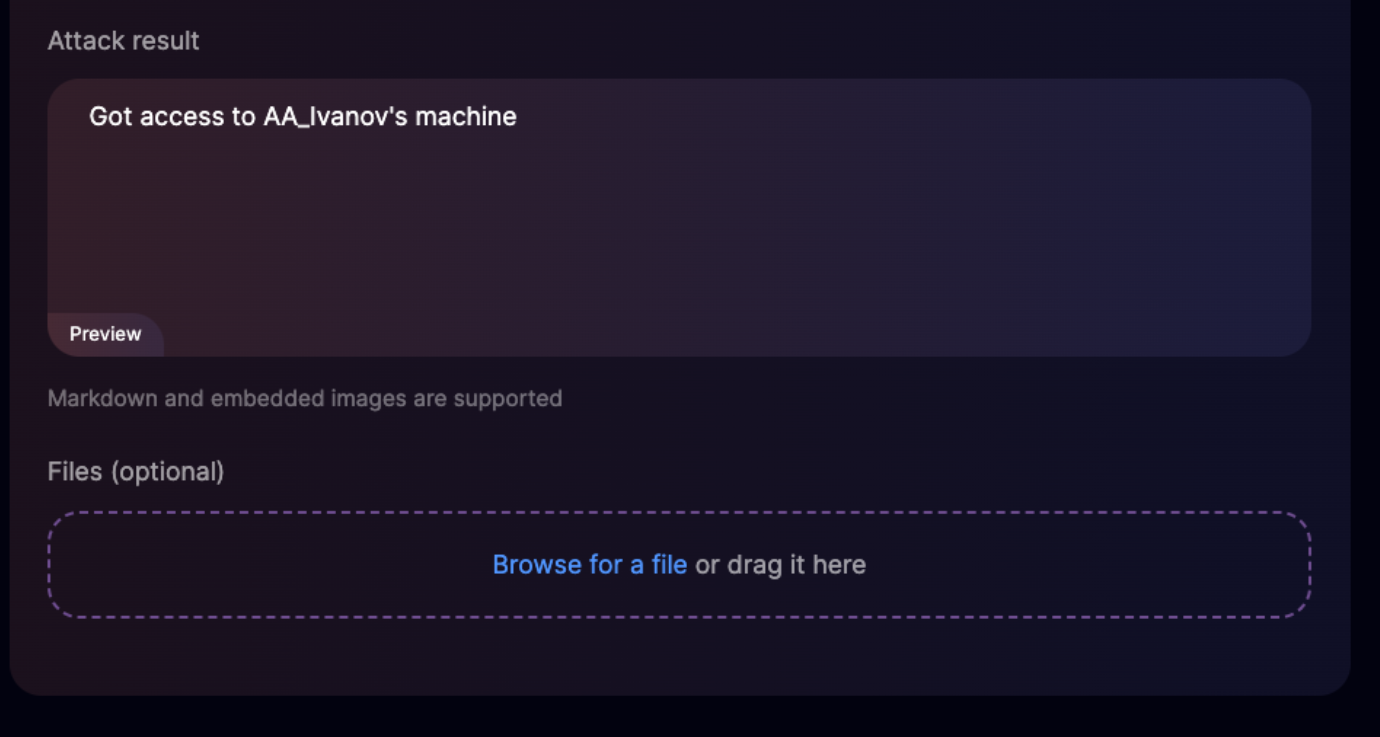
Adding files
Attach screenshots to confirm the steps and highlight any important information.
A screenshot is a must for the final step to confirm that the event triggering condition described in the task was met.
A screenshot is a must for the final step to confirm that the event triggering condition described in the task was met.
Checklist before submitting a report
To increase the chances of getting your report accepted, use the following checklist to go over it once again.
1. All fields are filled in

Report header.
Critical event.
Time (according to your time zone).
IP addresses.
2. The description is detailed and full
There's enough information about the event implementation.
To check yourself, go through all the steps to see if you can replicate the attack vector without having to guess anything.
All the details are provided for each step of the attack:
- You got an account—where?
- You elevated privileges—how?
- You found the information—where?
- You exploited a vulnerability—which application and exploit was it?
3. The description is clear
Use simple language.
Avoid obscure jargon.
Check your text for typos and fix obvious mistakes.
It's very important that the jury easily understands your report, so here are some recommendations:
If the jury finds it difficult to understand your description, your report will be sent back for revision.
4. The goal is achieved
Make sure the goal set in the task has been achieved. This should be confirmed by the final step and the screenshot attached to it.
5. The date and time of attack are correct and correspond to the facts
The time indicated for each step corresponds to your time zone.
The time is indicated consistently.
Time intervals are short and realistic.
Confirmations are in place
You have all the necessary screenshots, files, descriptions of exploits, and so on. They're particularly necessary for steps involving privilege escalation, vulnerability exploitation, access to account credentials, and obtaining of confidential information.
The final step is accompanied by a screenshot.
There are no links to other reports
There are no links to other critical event or vulnerability reports.
All steps leading to the triggering of a critical event are provided in one single report.
Final words
We hope this document has helped you to understand the report rules and requirements.
It would be very helpful for us if you could send feedback on this document to hello@standoff365.com. Tell us if the rules are clear, what you liked, what could be improved, and if there's anything missing. This will help us make the document even more useful.
If you need any information, contact us:
See you at the cyberbattle!
The Standoff team
It would be very helpful for us if you could send feedback on this document to hello@standoff365.com. Tell us if the rules are clear, what you liked, what could be improved, and if there's anything missing. This will help us make the document even more useful.
If you need any information, contact us:
- For any questions about the cyberbattle, email us at hello@standoff365.com or get in touch in our Telegram channel.
- For technical questions, email support@standoff365.com.
See you at the cyberbattle!
The Standoff team